Liquidswap for Beginners: Getting Started with our DEX

Liquidswap by Pontem is the most popular decentralized exchange (DEX) on the Aptos blockchain. It’s built on Move for maximum security, with multiple audits.
With Liquidswap, you can swap tokens, and earn through yield farming, staking, and liquidity pools. You can also bridge tokens from one blockchain to another.
In this tutorial, we’ll cover the very basics of starting on Liqudswap, making your first trade, and some simple ways to earn.
Connecting to Liquidswap
Liquidswap is available as a webapp at liquidswap.com.
To use Liquidswap, you’ll need an Aptos wallet. If you don’t have one, follow our Pontem Wallet tutorial to get started.
Click Connect Wallet in the top right. Then log into your wallet. Select the accounts you wish to connect, then click Connect to confirm. You should now see your token balances available in Liquidswap.
Swapping Tokens
Go to the Swap page to start trading.
Select the token you have from the drop-down in the top right of the top box and input the amount you want to trade. Then, select the token you wish to trade for in the bottom box. The price graph will adjust to reflect the token pair you selected. (The most popular tokens are already included, but advanced users can add new tokens by clicking Manage Token Lists.)
We recently added cross-chain swaps on Liquidswap! Head to the Bridged tab of the menu to trade Bitcoin, Ethereum, Solana, and more.
The section below the token pair contains some crucial information:
- Expected Output – the amount you should expect to receive before slippage and fees.
- Minimum received after slippage is the lowest possible result. Slippage is small unexpected changes in price that occur due to the mechanics of decentralized exchanges.
- Fee – the amount you’ll spend on Liquidswap and Aptos fees for the transaction. (Both have some of the lowest fees in the industry.)
- Curve Type – Liquidwap uses different algorithms for different types of trdades. Choose Correlated if you're swapping two related stablecoins (such as two US dollar-pegged coins like USDC and Tether). Use Uncorrelated for everything else.
(For a detailed explanation of slippage and correlated vs. uncorrelated swaps, check out our blog on liquidity mechanics.)
Hit Swap to initiate the transaction. A window for your wallet will pop-up. Sign the transaction and after a moment, your new token balances will appear.
Earning on Liquidswap
There are three main ways to earn on Liquidswap: staking, liquidity pools, and farming. Let’s go over how they each work. These strategies can get complicated. Remember to do your own research, never risk more than you can afford to lose, and start slow.
Providing Liquidity in Pools
Decentralized exchanges enable trades by keeping reserves of cryptocurrency. When someone makes a trade, the token they swap goes in and the one they swap for comes out. These are called liquidity pools. In order to maintain the pools, users add their own cryptocurrency holdings. In return, they receive an equivalent share of the trading fees that the pool generates. Check out our detailed article on liquidity pools here if this is new to you.
There are two categories of pools: V0-0.5 and V1. The former are simpler, and work exactly as described above. The latter allow you to concentrate your liquidity in specific sections of the pool to earn more rewards. V0-0.5 pools are better for beginners. Read this article to understand if V1 pools are appropriate for your skill level and risk tolerance.
Go to Earn → Pools in the top menu. Choose V0-0.5 or V1 with the slider on the top left. You can then sort pools by 24-hour volume, Annual Percentage Rate (APR), and Total Volume Locked (TVL). To add liquidity to a pool, hit the + button. You’ll need equivalent amounts of both cryptocurrencies already, so swap as needed before this step. Enter the amount you wish to add to the pool, then confirm the transaction in your wallet. You’ll receive Liquidity Provider (LP) tokens, which act as proof of your contribution and allow you to withdraw your takens later.
Leveraging LP Tokens in Farms
Now that you have these LP tokens, you could earn double rewards with them through farms. Go to the Farms tab to see the current farms, but note that they have an expiration date and change frequently. Sort by APR, TVL, and the reward currency. Most Farms pay rewards in APT, the native token of Aptos.
If you have LP tokens for a certain pool, you will see a rainbow pitchfork button. Click on the icon and enter the amount of LPs you wish to commit, up to the maximum allowed. Click Stake, then confirm the transaction in Pontem Wallet.
There is a 7 day lock period for farming, which will gray out the Withdraw button. You will still collect rewards during this period, but you can not take out your LPs yet. The Claim button for rewards will remain inactive until you’ve accumulated at least 0.01 APT in rewards.
Adding more LPs will reset the 7 day lock period. If the farm closes before your unlock date, your LPs will automatically be available to withdraw. For more details on how Farms work, read our detailed tutorial.
Staking APT
The third way to earn passive yield on Liquidswap is by staking APT. Aptos is a proof-of-stake blockchain, which means you can stake its native token APT to help power the chain, and earn rewards in the process. Because the rewards are generated directly by the blockchain, this is one of the safest and most reliable ways to earn on Liquidswap. Read our article on consensus mechanisms for much more detail on how this works.
On Aptos, validators perform the crucial role of verifying and confirming transactions. To incentivize their honesty, they must have a node (a dedicated powerful computer) and a large cache of 1 million APT. But with delegated staking on Liquidswap, you can get started with far less APT.
Validators manage the Aptos blockchain by voting to confirm transactions. Each round of voting has a leader, who gets the reward. Leaders are selected periodically by a special formula. The more APT a validator holds, the better their chances to be selected and earn rewards. This means validators compete to offer the best returns to users who stake with them, in order to improve their chances.
Staking works in 30 day periods, and you can only withdraw your APT on the last day. If you confirm the withdrawal before, your funds still won’t be released until the end of the period. The minimum amount you can stake is 10.001 APT. The minimum amount you can unstake is 10 APT. If your leftover stake will be less than 10 APT, your entire stake will be withdrawn.
The target APR is roughly 7%, but this can vary due to the process of selecting validator leaders. The validator will also take a commission of 7-12% of your rewards.
On Liquidswap, go to the Staking page. The Validators are sorted in order of their stake size, and each tile shows their commission, number of delegators (people who stake with them), and next unlock date. To select one, click Stake, then enter your APT amount. Confirm the transaction in your wallet. The My Holdings tab shows your stakes. When the unlock period has concluded, you will be able to withdraw them there. Read our detailed tutorial on delegated Aptos staking here.
Advanced users can take advantage of bridge, concentrated liquidity, and other passive income strategies. Make sure to read our linked tutorials first to understand if they’re right for you.
Now you know how to swap and earn on Liquidswap! You can now take advantage of the speed, security, and low fees of Liquidswap and the Aptos blockchain.
Dashboard
The Dashboard shows the top users on Liquidswap, as well as your achievements.
At the top, you’ll see NFTs and other rewards you’ve earned for swapping and holding DooDoo, collecting Pontem NFTs, and other Aptos memecoins.
Down below, you’ll see the top Liquidswap accounts by volume. The leaderboard refreshes monthly, so keep trading to see your name on the list!
Lumio on Optimism (testnet) & Liquidswap
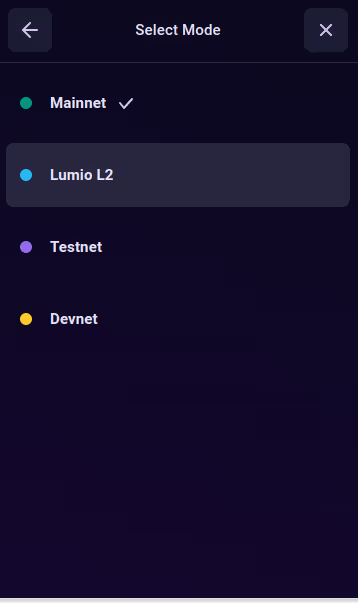
Once you’ve been whitelisted to test Lumio on Optimism (EVM & Move VM), make sure to switch the network in Pontem Wallet from Mainnet to Lumio L2.


Lumio on Move VM
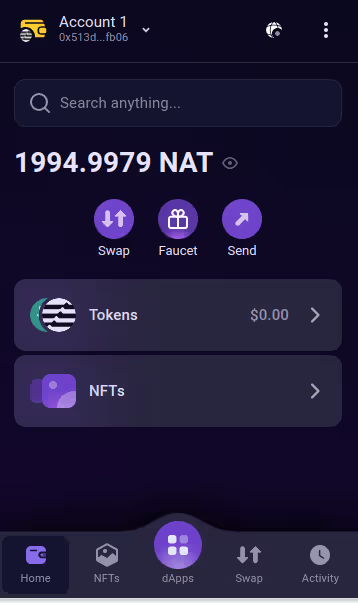
- Claim gas coins. In Pontem Wallet itself there is a faucet that distributes NAT – just another ticker for testnet ETH that xLumio uses for gas. NAT doesn’t have any real-world value.

- Use Liquidswap. Liquidswap supports Lumio on Move VM, so you can make swaps or add liquidity to pools straight away. Liquidswap for Lumio features a faucet where testers can claim testnet BTC and USDT for swaps. Of course, since these are testnet pools, the prices can differ wildly from real-world prices. This is fine, since testnet coins are valueless anyway.
- Explore. Lumio on Optimism (testnet) already has its block explorer where users can track their transactions.
About Pontem
Pontem Network is a product studio building foundational dApps for Aptos. Other Pontem products include:
- Lumio: an Optimistic Layer 2 for Move and Ethereum
- Liquidswap: the leading Aptos DEX
- Move Playground: a browser Move code editor
- ByteBabel: the Solidity-to-Move bytecode translator

.svg)


