.svg)
FAQ: Liquidswap, Pontem Wallet & Bridging To Aptos


Every day we field questions from Pontem Wallet, Liquidswap DEX, and LayerZero bridge users. Here, we answer the most common questions: how to calculate bridging fees, what to do if a wallet transaction doesn’t go through, how to list a token on Liquidswap, and more.
Pontem Wallet
Private and Public Keys
What is a private key?
Every Aptos account has a pair of keys: one private, one public. A private key is like a secret password that grants you the ownership of the resources (coins) in the account. Its used to sign (approve) transactions.
The private key to an Aptos wallet is an alphanumeric string starting with 0x, for example:
0xb9667b783b9ee2427cfea689cdb82ef79648f5fe47d3704cfq3513520163l646
(This is just an example, not a real private key!)
You need to distinguish between a private key and a secret recovery phrase (or seed phrase) – a sequence of 12 words that is generated based on the private key. Both can be used to import a wallet – and you need to keep both secret.
Where is my private key?
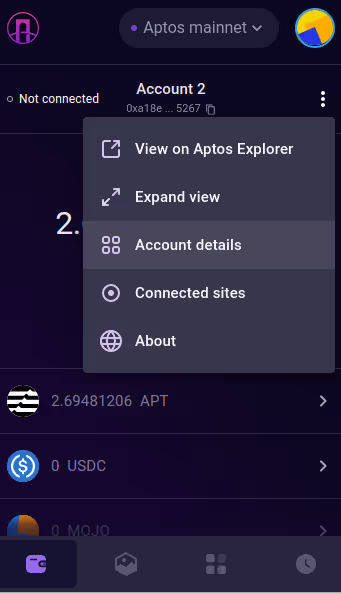
To access and export the private key, click on the three dots to the right of the account name and then on Account Details.
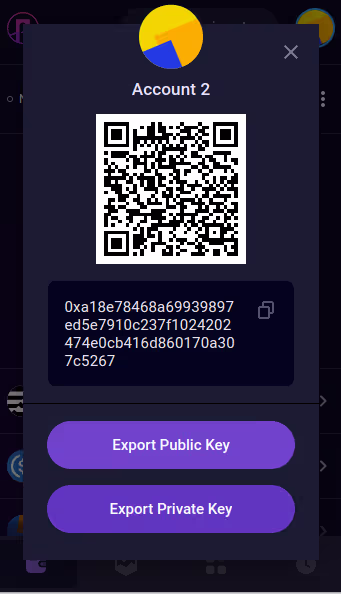
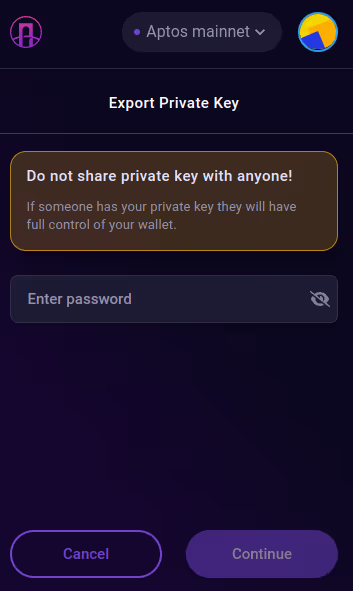
Click on Export Private Key. You’ll need to enter your password to be able to copy the private key to clipboard.
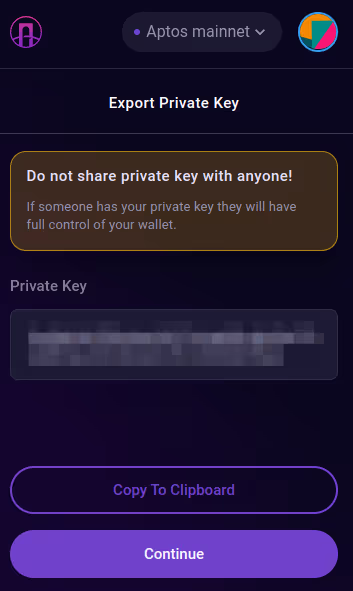
Save the private key in a safe location where you’ll be able to access it in the future. Don’t send it or reveal it to anybody!
What is a public key?
A public key is another alphanumeric string starting with 0x, like this:
0xa72g41df8562337523c89658468220ab8d78ee24wgb1cf2e9f98eaa8d56aefce
Unlike in Ethereum, Solana etc., an Aptos account’s public key is not the same as an account address. An Aptos public key, together with the private key, is used to generate an authentication key. As a regular user, you’ll hardly have to use the public key. NOTE: Never send tokens to a public key! Your tokens will be lost. Always send tokens to the account address.
Key rotation in Aptos
Aptos has a very interesting feature called key rotation, where you can generate a new pair of private and public keys – but the account address will remain the same. This is extremely valuable in the event your private key or seed phrase becomes compromised: you can get new ones, but keep the old wallet address.
For more info on accounts and keys, see the Aptos Docs.
What happens if I send assets to a private key?
Short answer: the funds will be lost. Don’t send tokens to a private key instead of an address!
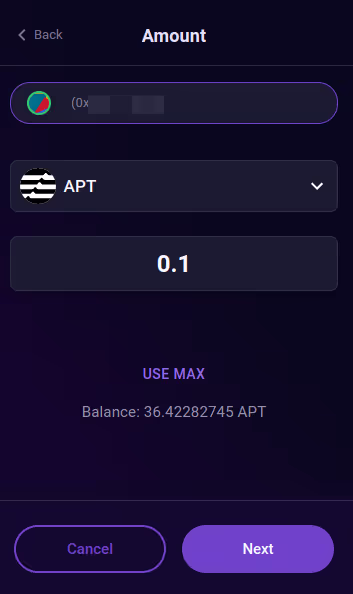
In this example, we’ll try sending 0.1 APT from Account 1, which holds 36.42 APT, to Account 2, which holds 0.39 APT. But instead of the address of Account 1, we’ll enter its private key.
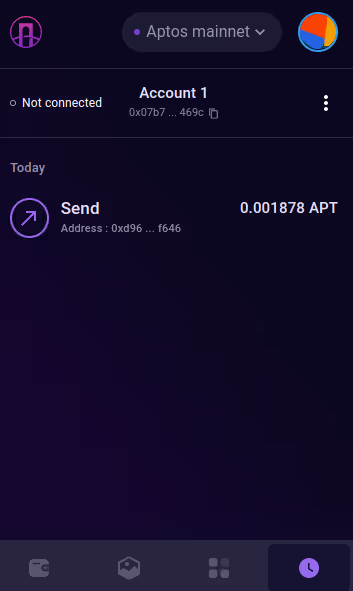
The transaction does go through, and 0.1 APT plus the gas fee of 0.001878 APT is deducted from Account 1, leaving it with 36.32 APT. But Account 2 doesn’t receive the transfer.
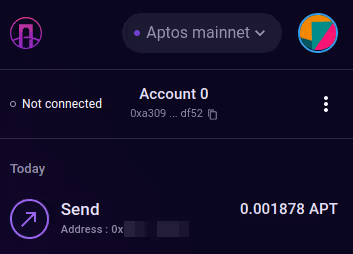
Where is the 0.1 APT? Aptos Scan confirms that the transaction was successfully sent to the private key ‘address’ that we erroneously entered as the recipient address. Searching for the private key in Aptos Scan does indeed show that it now holds 0.1 APT.
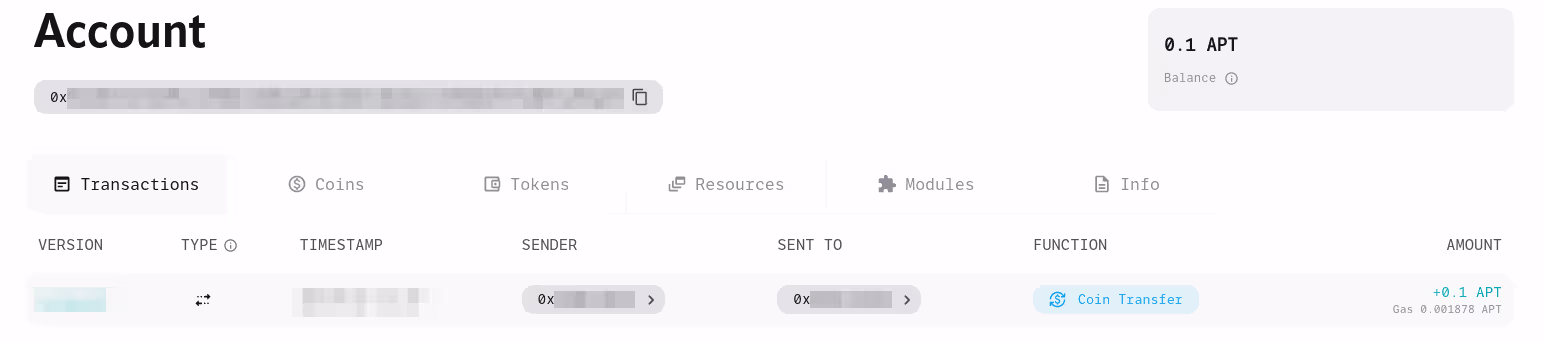
What happened was that a new account was created, with the address as the private key you’ve entered when sending the coins. However, there is no way for anybody access this new account. You’ll never get your APT back.
What happens if I send coins to a public key instead of an account address
Short answer: the funds will be lost, so don’t do it!
A new account will be automatically created on the blockchain with an address that is the same as the public key that you’ve entered instead of the account address. You won’t have access to this new account and you won’t be able to get your APT back. See ‘What happens if I send assets to a private key?’ for details.
How to import a Pontem wallet on Aptos
Save your secret mnemonic phrase!
When you first create a Pontem Wallet, you’ll receive a 12 word seed phrase (sometimes called a secret recovery phrase or mnemonic). You’ll need that phrase to import an Aptos wallet in the future, so make sure to save it in a very safe location.
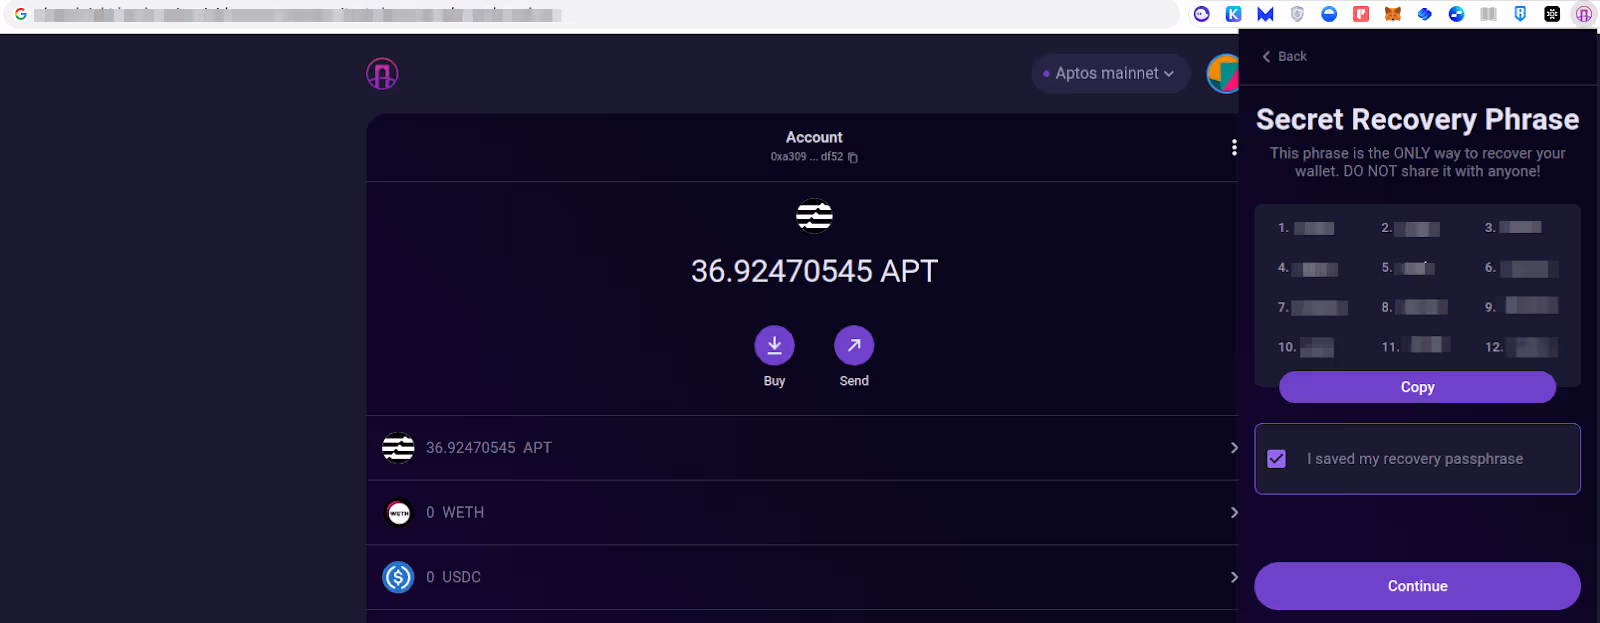
Where is my seed phrase?
You’ll need to save it in a safe place when you first create a wallet, as there is no way to see it in the wallet again later (for the time being). Make sure you have access to the saved seed phrase before you reinstall a Pontem Wallet.
In one of the upcoming versions of Pontem Wallet, we plan to add the possibility to visualize the seed phrase at any moment.
How to import a wallet using a seed phrase: (Option 1: you have just one account)
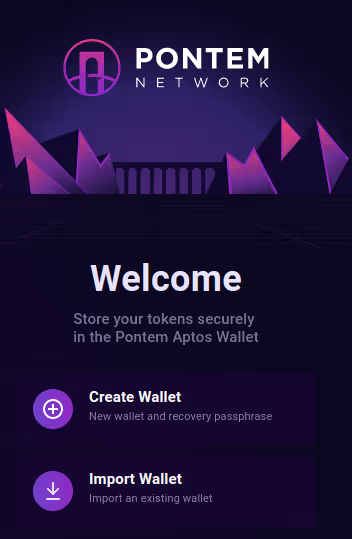
Choose Import Wallet and paste the secret recovery phrase. You don’t need to enter it word by word: place the cursor in the first word field and click Ctrl+V (Command+V for Mac users) to paste all the words into their corresponding fields.
Scroll down and enter a new password, then confirm it. Click on Import, and you should see your account with all the tokens in it.
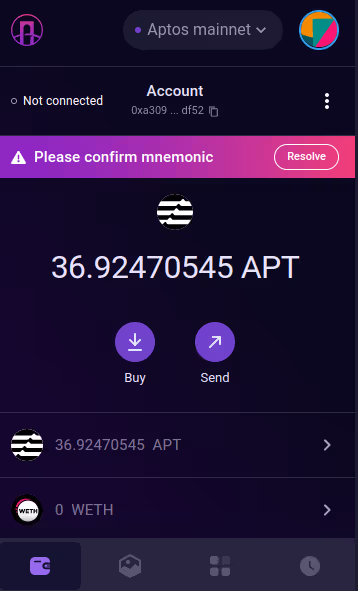
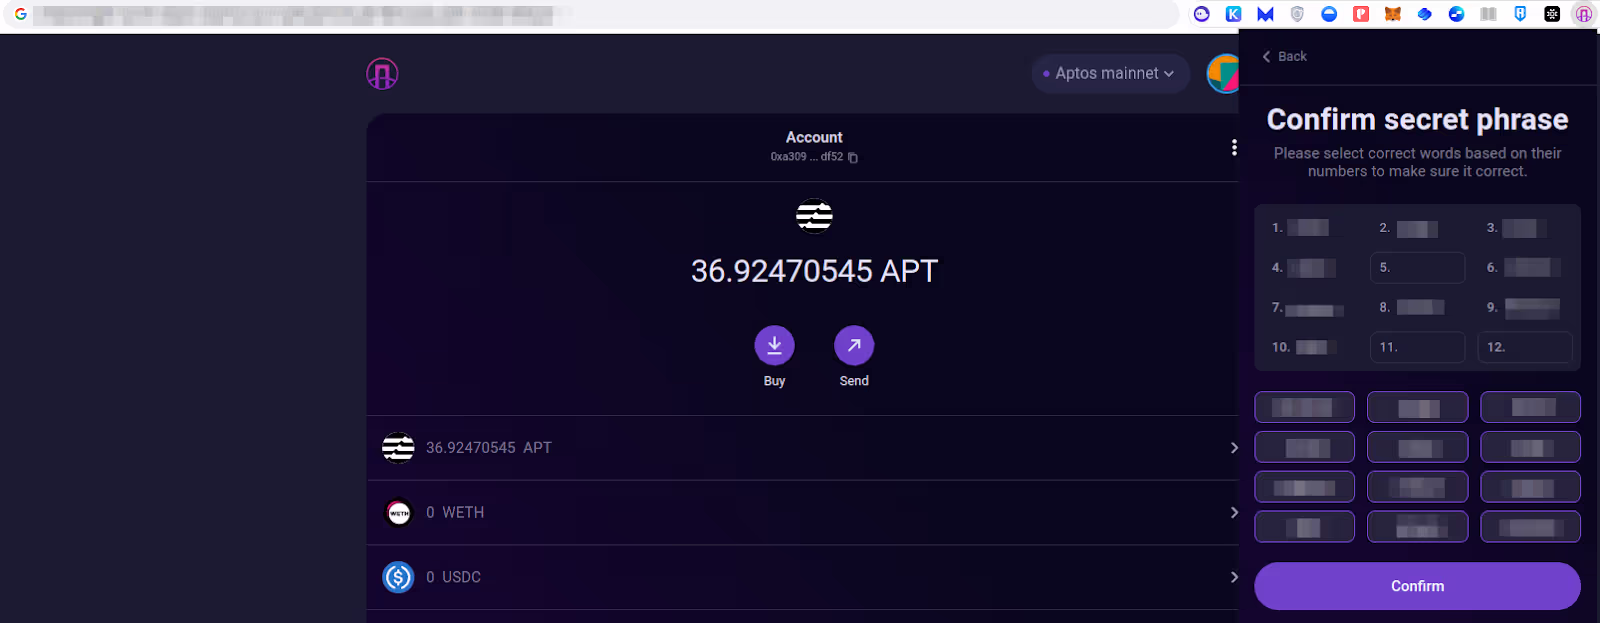
The wallet will then ask you to confirm the mnemonic phrase to make sure you’ve saved it. Click Resolve and complete the challenge, matching the correct words to the empty fields.
Tip: To make this step more comfortable, paste the seed phrase into the browser’s address line. This way you’ll have it in front of your eyes when you need to enter specific words.
That’s it - your wallet is back and all set up!
How to import an additional account (Option 2: you have additional accounts that were created, not imported)
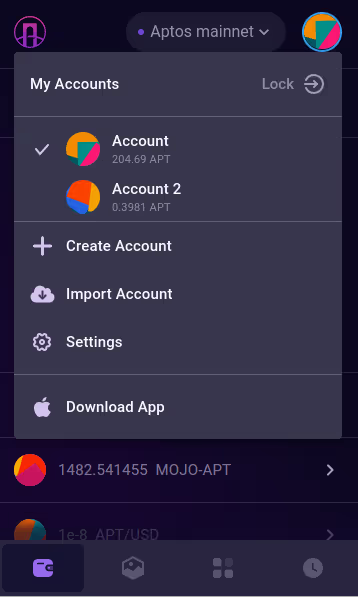
Many Aptos users have more than one account in their wallet (Account 2, Account 3 etc.). When you import a wallet, such additional accounts are imported automatically, as long as they have a non-zero APT balance and are not marked as ‘Imported’. The system will check for any additional accounts associated with the same secret phrase and restore your old accounts with the same addresses as before and with the balances intact!
In this example, it is Account 2.
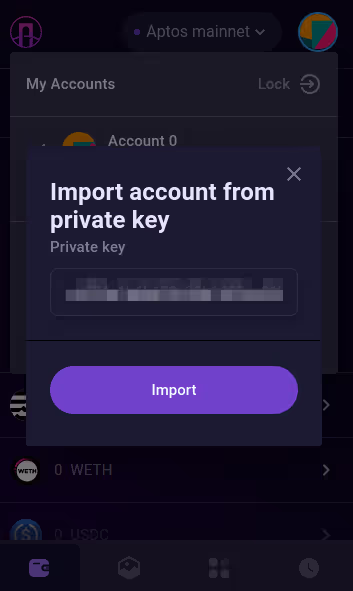
How to import a wallet using a private key (Option 3: you have additional accounts that were imported)
There is another, more advanced way to import accounts: using private keys. The important thing to remember is that any account that was previously imported this way will need to be imported using its private key in the future.
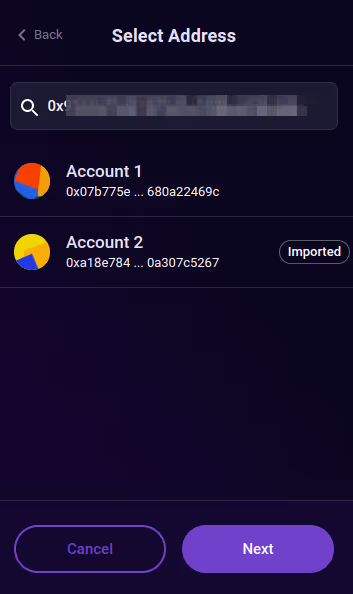
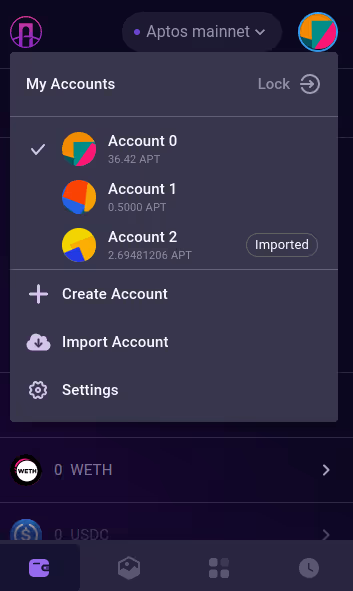
In this example, Account 2 is marked as ‘Imported’, meaning that it was imported using its private key, while Account 1 doesn’t say ‘Imported’, meaning that it was created or imported in the regular way.
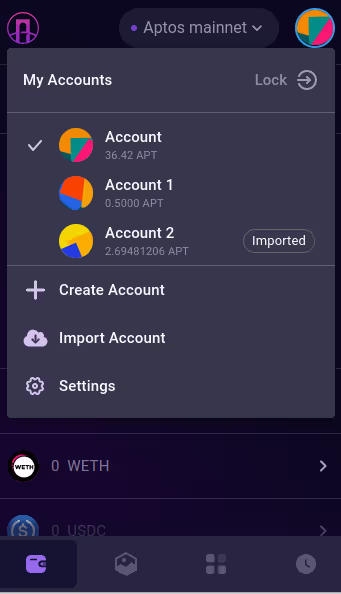
In order to be able to import Account 2 in the future, you need to copy and save its private key first. To do this, switch to Account 2, then click on dots to the right of the Account name, then on Account Details.
Click on Export Private Key. You’ll need to enter your password to be able to copy the private key to clipboard.
Save the private key in a safe location where you’ll be able to access it in the future. Remember: you’ll need this private key if you decide to reinstall the wallet and import this account in the future!
When reinstalling the wallet, you initially won’t see the imported Account 2. To import it, click on the avatar and then on Import Account.
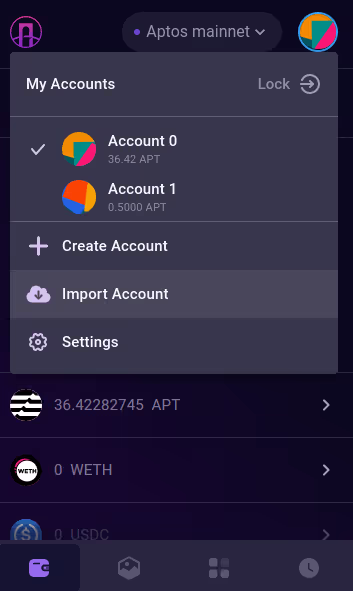
Paste the private key you’ve saved earlier and click Import. The account should be restored with its old address and balance.
How to add a new token to the wallet
There are several ways to add a new token on Aptos to a wallet: choosing from the list, direct import with a contract address, through Liquidswap, and through third-party exchanges.
Add token from a list
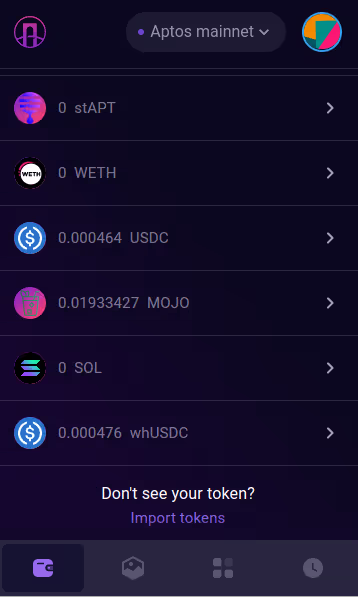
At the bottom of the wallet dashboard, click Import Tokens to access the list of verified assets. It is divided into four sections: LayerZero bridge tokens, Wormhole bridge tokens, Celer bridge tokens, and native assets (those originally issued on Aptos). In total, in Pontem Wallet 2.2 the list features almost 50 tokens.
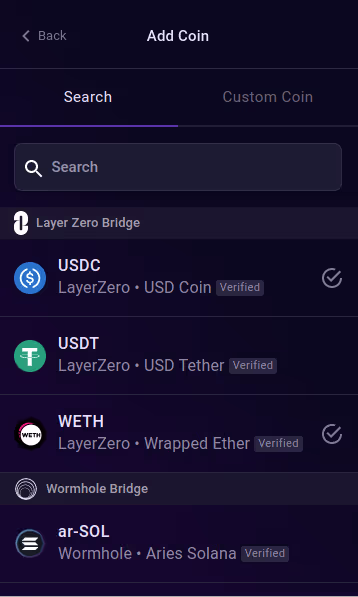
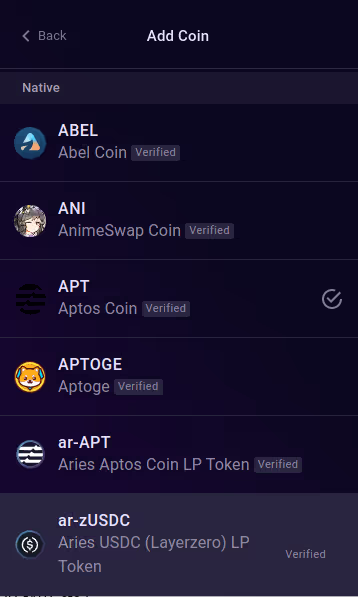
The ‘Verified’ label means that the Pontem team conducted a due diligence of the project and confirmed that it passed a security audit. However, don’t take this as an indication of the token’s future success. ‘Verified’ doesn’t mean ‘endorsed’: every blockchain project carries risks, and Pontem won’t be held liable for any losses that can result from interacting with the tokens on the list.
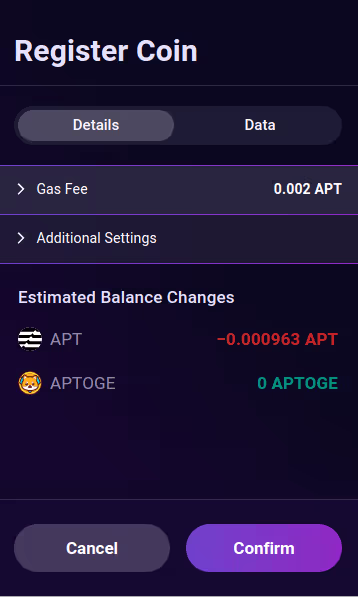
To add a token, simply click on it and then on Confirm. There is a small gas fee to pay for adding each asset. The token will appear on the list in the dashboard.
Import token to Pontem Wallet directly
Use this method if you want to add an unverified asset, but be aware of the risks! An unaudited project’s code can contain critical vulnerabilities or even be malicious. Pontem won’t be liable for any consequences of importing and interacting with third-party assets.
Locate the token’s contract address. For the addresses of the main assets on Aptos, see Pontem’s Coin Registry. For other tokens, look on each project’s website in the Documentation section or in their Discord.
Be careful! Don’t trust token addresses published on third-party websites. They can be fake, even if the name of the token is the same as that of a well-known asset.
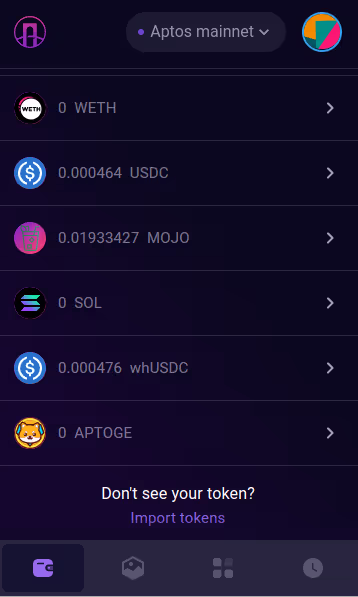
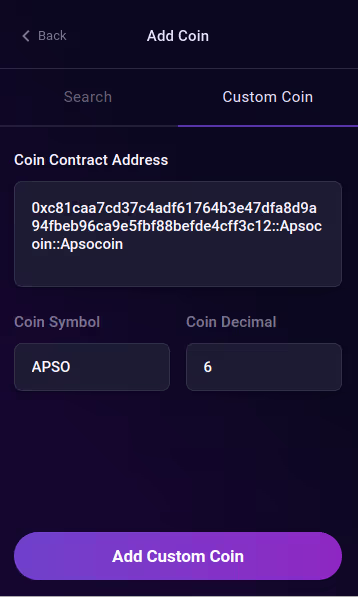
In the Home tab, click on Import Tokens and then switch from Search to the Custom Coin tab.
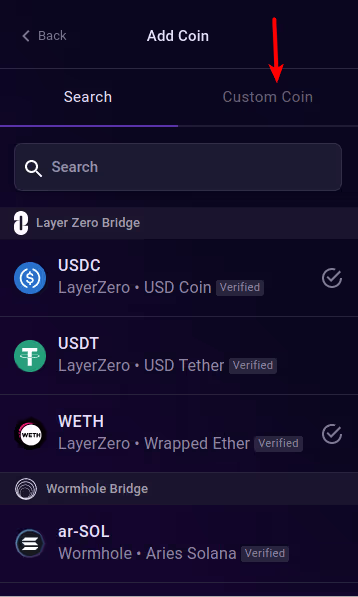
Paste the token’s address in the Coin Contract Address field.. The token symbol should be filled in automatically. Click on Add Custom Coin, then on Register. Confirm the fee.
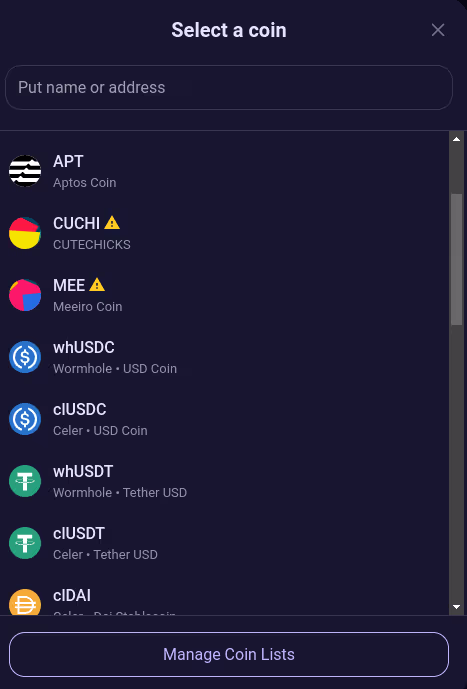
Through the Liquidswap interface
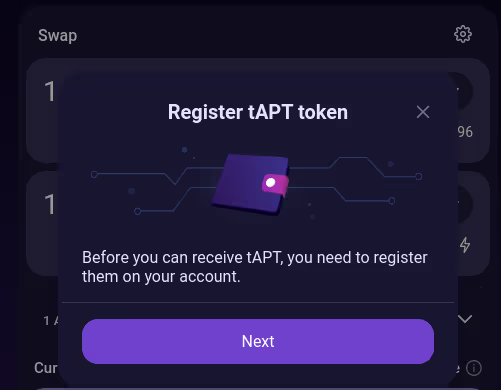
If you are going to buy a token on Liquidswap, you can add and register it automatically as part of the swap. Select the asset you want to sell (such as APT) and the new token you want to buy (e.g. tAPT). The DEX will prompt you to register the token first: approve the transaction and it will be automatically added to your wallet.


Through third-party DEXes
Some Aptos exchanges, such as AnimeSwap, perform token registration as part of a swap. Therefore, if you swap an asset that you already have, like APT, for a token you don’t have yet, it will be automatically registered and appear on the wallet’s balance.
How to add APT to Pontem Wallet
There are two main ways to add APT to a Pontem Wallet: withdraw from a CEX or bridge another token and buy APT on Liquidswap.
1.Withdraw from a CEX
$APT is listed on major centralized exchanges like Binance, Huobi, FTX, KuCoin, and Coinbase. If you are registered on one of them, buy $APT and withdraw it to your Pontem Wallet. Make sure to choose Aptos in the list of networks. Your withdrawal will be processed within a few minutes.
Important! Don’t enter your MetaMask address when withdrawing $APT from an exchange. Aptos and MetaMask addresses look similar as they begin with 0x, but Aptos is a completely different network that isn’t compatible with EVM networks like Ethereum or BNB Chain. If you accidentally send $APT to a MetaMask address, it can be lost.
2. Bridge & Buy
You can bridge USDC, USDT, or WETH from various blockchains using the LayerZero bridge widget on Liquidswap or Portal by Wormhole. If using the LayerZero bridge, make sure to read the tutorial first: https://pontem.network/posts/how-to-bridge-tokens-to-aptos-buy-apt-on-liquidswap
It can take from a few minutes to a few hours to process a bridging transaction, depending on the network load, so be patient.
How to get USDT in Pontem Wallet
There are two main ways to add USDT to an Aptos Wallet: trade for USDT on Liquidswap or bridge USDT to Aptos from another blockchain.
- Buy on Liquidswap for APT: You can buy $APT on major exchanges like Binance, Huobi, FTX, KuCoin, and Coinbase. Withdraw APT from the exchange to your Pontem Wallet, making sure to choose Aptos in the list of networks. Next, connect to Liquidswap and use APT to buy USDT.
- Bridge: You can bridge USDT to Aptos from Ethereum, BNB Chain, Polygon, Avalanche, and other chains using either the LayerZero bridge on Liquidswap or Portal by Wormhole. See our bridging tutorial for details.
When will Pontem release its token?
Pontem Network does not have a token or a timeline for releasing one. If the team does decide to release a token in the future, the information will be published on https://pontem.network/. Anybody who offers you to buy Pontem tokens on any blockchain or DEX is a scammer. Please block and report them.
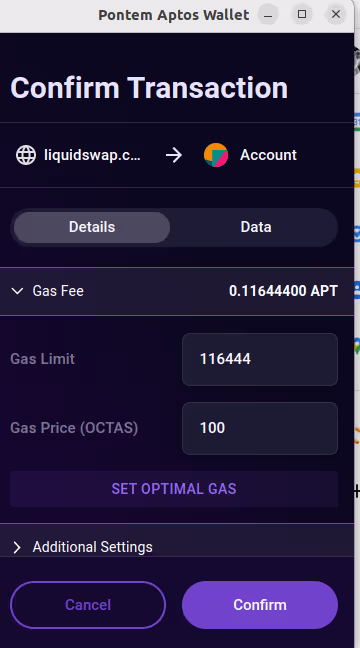
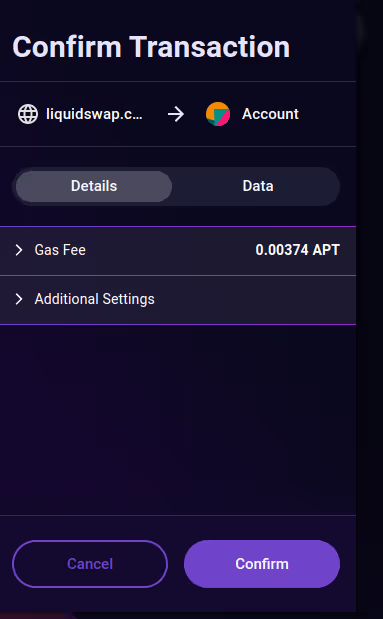
Why is the transaction fee so high?
The fees on Aptos are very low for the most part (around $0.02 to send tokens), but occasionally we receive questions like this one:
“When I wanted to approve a transaction, the fee was 0.29 APT. Why?”
There are a few situations when the the transaction fee can be unexpectedly high:
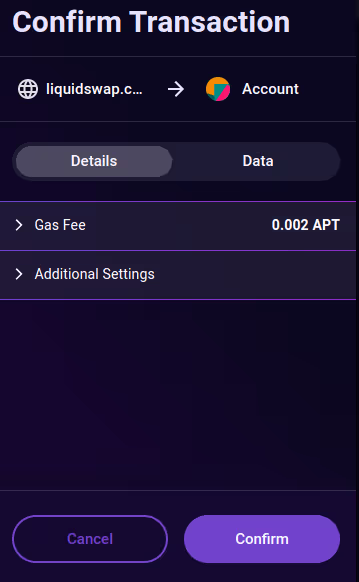
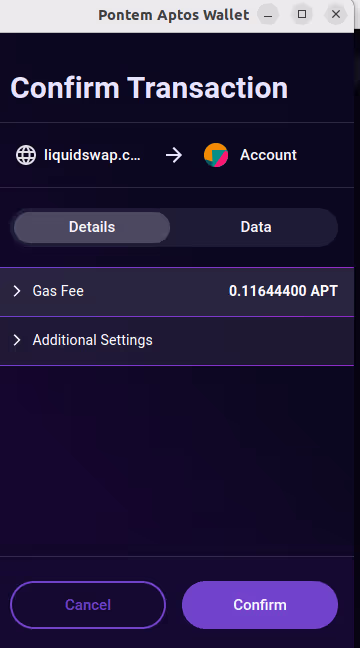
- Incorrect gas estimation. Pontem Wallet runs a simulation to predict how much gas you need to make sure the transaction succeeds, but occasionally the estimate is too high, or the wallet receives incorrect information from the dApp.
The solution is to set the gas fee to optimal: click on the small arrow next to Gas Fee to open the gas fee settings section, then click on Set Optimal Gas. In many cases (though not always), you’ll see the number go down quite a bit.
You can also set a lower gas fee manually. Note that if you set it too low, the transaction can fail, but you’ll still pay the gas fee.
If you feel that the optimal gas fee is still unusually high on Liquidswap, feel free to send a message in Pontem’s Tech Support chat on Telegram. If you encounter abnormally high fees in other dApps, contact their respective teams.
1. NFT transactions are more computation intensive than other transactions. Minting NFTs is particularly complex.If you see a gas fee of 0.5 APT or higher when minting on a launchpad like Topaz, Souffl3, or BlueMove, don’t be alarmed.
2. Errors in communication between a dApp and Pontem Wallet. We test all new dApp integrations thoroughly, but sometimes bugs escape us. If you see that the gas fee for a dApp transaction is really high (over 0.1 APT), drop a message in Pontem’s official Tech Support chat on Telegram, attaching screenshots and a detailed description.
What to do if a transaction doesn’t work
- Out of gas: Make sure that you have enough APT to pay for gas and/or that the gas fee isn’t set too low (if you see a ‘Gas fee less than recommended’ error.)
- Token not registered: On Aptos, a token has to be registered on an account before you can receive it or transact to it. This is to prevent scammers from sending out fake and malicious tokens. So before you send a token to someone, make sure they import it into the wallet.
- Pending bridging transactions: Bridging can take time (up to 72 hours after transferring tokens from Aptos). Make sure to copy the tx hash (ID) to check its status on LayerZero Scan (when using the LayerZero bridge on Liquidswap). Even if a transaction is listed as ‘Failed’ in the bridge widget, it can be simply pending.
- Transaction expired: This error can happen due to timestamp issues and miscommunication between a dApp and a wallet. Please report these bugs to Pontem’s Tech Support chat.
- Invalid Payload: Try deleting the dApp’s cache data with Chrome DevTools. You can also try to uninstall and reinstall Pontem Wallet, importing your main account with the secret recovery phrase. If you have additional accounts (i.e. Account 2, Account 3 etc.), we recommend that you save their private keys before reinstalling Pontem Wallet to make it easier to restore them.
My assets disappeared! What should I do?
The beauty of blockchain is that nothing really disappears without a trace. Still, we receive questions from users who can’t find their tokens.
You’ve swapped tokens on Liquidswap and received much less than expected. The most probable reason: swapping into a pool with low reserves, in which case you’ll receive only as much as the pool is able to give you. Always check a pool’s reserves before swapping.
You’ve imported a Pontem Wallet and your old additional accounts (Account 2, Account 3 etc.) are gone. Solution: create a new Account 2 - and you should see the old Account 2, as long as it has a non-zero balance. Do the same for other missing accounts. (See above.)
You’ve bridged assets and didn’t receive them on the destination chain. Check the transaction’s status on LayerZero Scan or in Portal’s Redeem tab (depending on which bridge you’ve used); if it’s still pending, be patient. Always make sure to save the ID (hash) of your bridging transactions.
You’ve bridged assets and more APT/ETH/etc. is gone from your account than expected. Most likely, you forgot to check the full bridging fee estimate, which includes both source and destination gas fees. See the bridging tutorial.
Liquidswap
What is Liquidswap and how does it work?
Liquidswap is the first and biggest decentralized exchange (DEX) and automated market maker (AMM) on the Aptos blockchain. After the Aptos mainnet launch, it quickly reached $10 million in total value locked, becoming the single biggest DeFi dApp on Aptos. The DEX supports all major wallets for Aptos: Pontem Wallet, Petra, Martian, Rise, and Fewcha.
Liquidswap features both regular (Uniswap-style) swaps between uncorrelated assets like APT/USDT or MOJO/APT and stable swaps (Curve-style) for correlated pairs like USDT/USDC. You can add liquidity to both types of pools to earn a passive income from trading fees (up to 1,000% APY in October 2022).
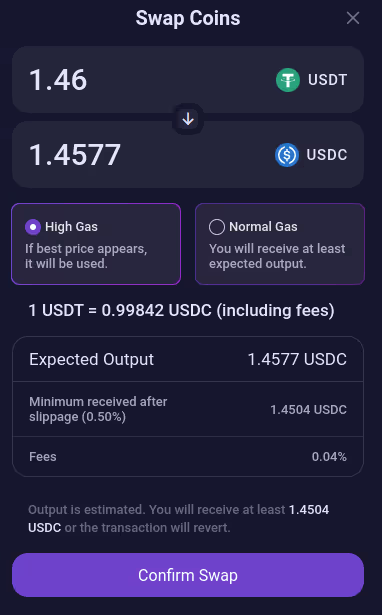
For stable swaps, we also offer a choice between normal gas and high gas. The advantage of the latter is that if a better price becomes available, it will be used. The actual gas fee can turn out to be the same for both options.
Liquidswap even has an integrated bridge by LayerZero, so you can bridge USDT, USDC, WETH and other assets from EVM chains like Ethereum, BNB Chain, and Arbitrum.
There are several ways you can interact with Liquidswap:
- Swap APT, bridged assets (such as LayerZero USDT), DeFi derivatives (such as liquid staking tokens issued by Tortuga and Ditto Finance), and tokens issued on Aptos, including those that are not available on centralized exchanges yet.
- Become a liquidity provider and earn a passive income from trading fees.
- Create your own pool and add liquidity to it.
- Participate in liquidity mining campaigns (coming soon).
If you’ve already used other DEXes like Uniswap, Curve, PancakeSwap, etc., you should have no trouble using Liquidswap. The only big difference is that it has both regular (uncorrelated) and stable (correlated) pools, but in most cases the correct pool type will be selected by default for each pair.
What is the TVL of Liquidswap?
As of late October 2022, Liquidswap DEX had a TVL of $12.4 million, making it the biggest DeFi dApp in the Aptos ecosystem, according to DeFiLlama. https://defillama.com/chain/Aptos
TVL stands for Total Value Locked and means the total amount of liquidity deposited in the protocol. For DEX, it’s the liquidity held in all the pools.
Whenever you deposit crypto in a liquidity pool on Liquidswap, it is counted towards the TVL. Being a liquidity provider on Liquidswap is currently very attractive, as you can earn over 100% APY from trading fees, Explore the available pools and deposit liquidity here: https://liquidswap.com/#/add-liquidity
What are the requirements for listing on Liquidswap?
- Audit: As security is a key priority for Pontem, we work only with audited projects. For a token to be added to the default list of assets on Liquidswap, it needs to provide an audit report. If you haven’t completed an audit yet but would like to do so, we can connect you with one of our trusted security partners.
- Public team or KYC: If your team isn’t public (doxxed), you can opt for a KYC with Pontem. We will not reveal the team members’ identities, but we need to know who we are working with.
Apart from a Liquidswap listing itself, audited projects can benefit from Pontem’s co-marketing campaign and even join our incubation program.
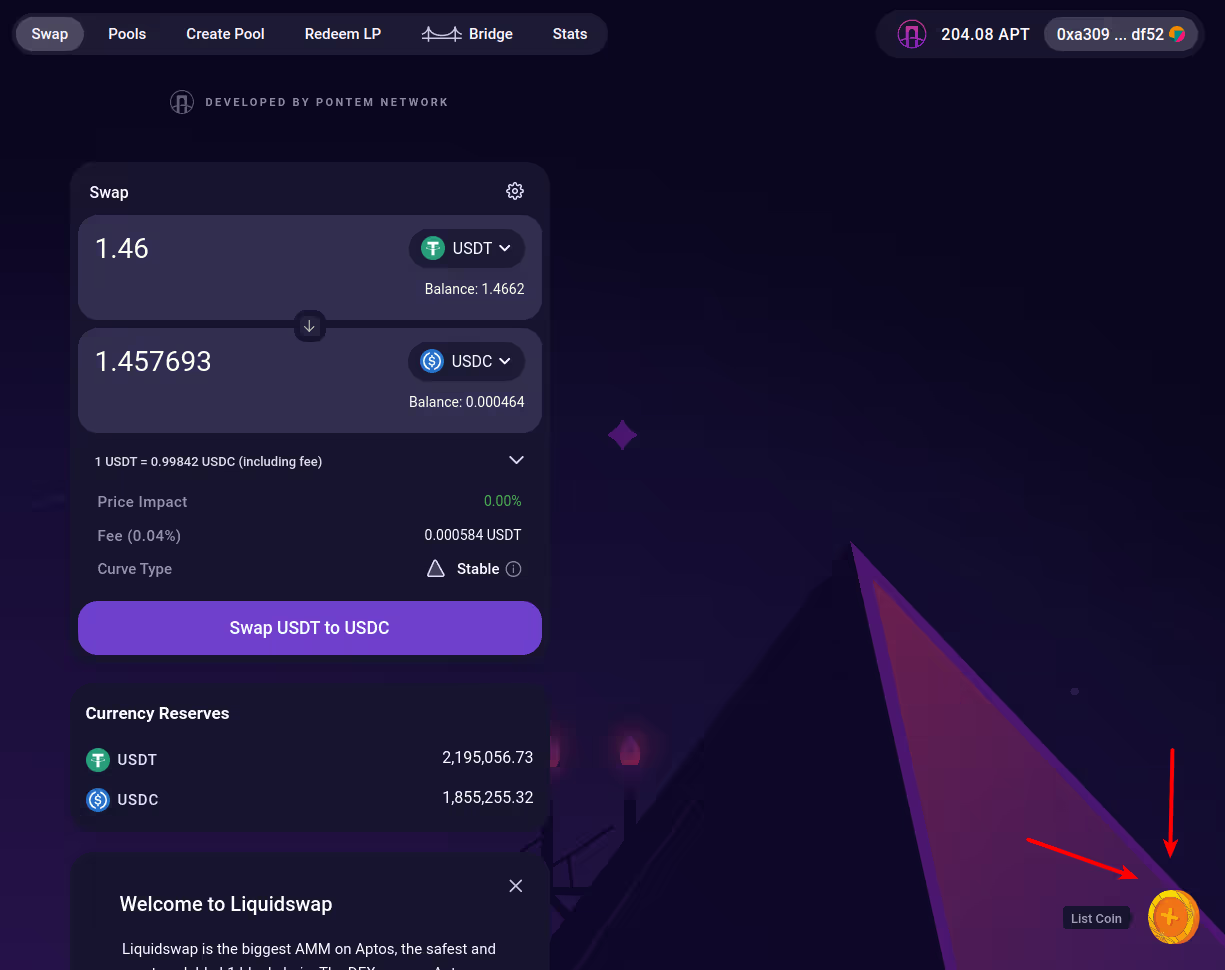
To submit a listing application, click on List Coin on Liquidswap (in the bottom right), then on List Your Coin to access the typeform. Once submitted, it will be reviewed by Pontem’s team, and our partnership lead will get back to you.

Are all listed tokens audited?
All the tokens and coins you see in the default list on Liquidswap are audited and verified. These include APT; assets bridged from other chains via the LayerZero, Wormhole, and OmniBTC bridges (USDT, USDC, WETH, BTC, SOL, XBTC); and the tokens of Pontem’s verified partners, such as Argo (USDA), Tortuga Finance (tAPT), Ditto Finance (stAPT), Mojito Markets (MOJO), etc.
How to avoid fake and scam tokens on Liquidswap
Liquidswap is a decentralized platform, so technically anyone can create a pool for any new token on Aptos, add liquidity to it, and start trading. For your security, we recommend the following:
- Swap only to and from assets on the default list.
- Use the list in Pontem Wallet to add new tokens. Don’t trust token contract addresses found on third-party sites.
- Pay attention to the yellow warning icon next to unverified tokens on Liquidswap and in Pontem Wallet. It doesn’t mean something is wrong with them; rather, the Pontem team hasn’t performed due diligence or verified if such projects are audited or not.
Where can I find information about token listings?
Pontem & Liquidswap list only audited tokens after a comprehensive due diligence procedure. Newly listed tokens are added to the default asset list on Liquidswap. We also announce all listings on Twitter, so make sure to give Pontem a follow.
What is a liquidity pool?
A liquidity pool is a deposit of liquidity (crypto tokens) locked in a smart contract that can be used by other participants to perform swaps, take out loans, and carry out other financial transactions on the blockchain.
On a DEX like Liquidswap, every liquidity pool contains two tokens (the two sides of a currency pair), such as APT and USDC. As users perform swaps, they pay fees, most of which are distributed among the liquidity providers who deposited liquidity in the pool.
Examples of popular liquidity pools on Liquidswap are APT/USDC, APT/USDT, etc. Liquidity pools also exist in lending protocols (where they normally feature just one token) and other types of DeFi apps.
What is an LP token?
An LP token (short for a liquidity provider token) is a special token that you get when you deposit liquidity in a liquidity pool on Liquidswap or any other DEX. It functions as an IOU, proving that you own a share of the pool and are eligible for a corresponding share of the fees. When you claim (redeem) your liquidity from a pool, LP tokens are burned.
In Pontem Wallet, Liquidswap LP tokens are displayed as USDT-APT, USDC-APT, tAPT-APT, and so forth, depending on the currency pair. Whoever holds the LP tokens can claim their share of the pool and its fee rewards: for example, you can send LP tokens to another wallet account and then use it to redeem the funds. Note that the recipient account will first need to register the LP token in order to receive it.

LP tokens play a crucial role in yield farming. Staking LP tokens is required to earn farming (or “liquidity mining”) rewards.
What is impermanent loss?
Impermanent loss (IL) is the difference in the value of the tokens you redeem from a liquidity pool compared to what their value would be if you hadn’t deposited them in the pool at all, resulting from the change in their relative price. The loss is called impermanent because it disappears if the prices return to the original values, but in practice the loss can be quite real.
IL affects liquidity providers on all DEXes, and if you become a liquidity provider on Liquidswap, you should be aware of it.
Example: the price of APT is 10 USDT, and you deposit 10 APT and 100 USDT in a pool for a total value of $200. Let’s also assume that the pool now has 50 APT and 500 USDT (worth 1000 USDT in total), so that you own 20% of it (200 USDT).
After a while, you decide to redeem the liquidity. In the meantime, the price of APT has increased to 40 USDT and the ratio of the two assets in the pool has changed: now there is 1000 USDT and 25 APT in the pool, so your 20% share will give you 200 USDT and 5 APT, for a total equivalent of 400 USDT. This seems like a great result, but if you had simply held on to your original 10 APT and 100 USDT, you’d now have 10*40+100=500 USDT worth of assets. The 100 USDT difference is your impermanent loss.
As a liquidity provider, you need your income from trading fees to be larger than the IL to earn a net profit. For example, if the trading pool has generated a total of $1000 in fees, you’re entitled to 20%, or $200, so your final profit (fees minus the IL) is $100.
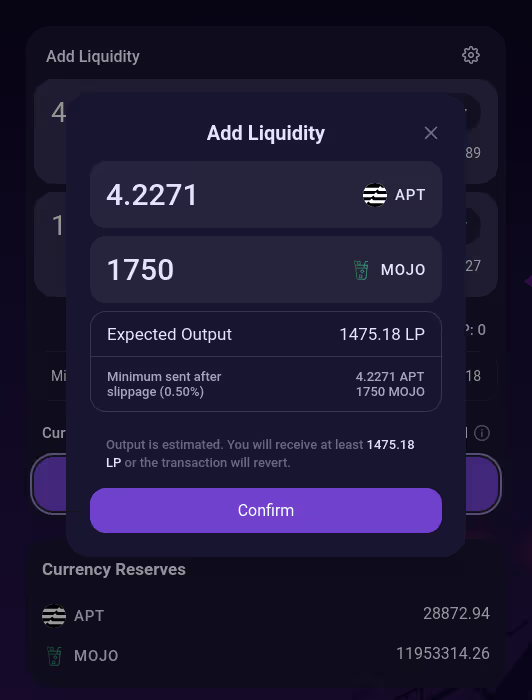
How to add liquidity on Liquidswap
To become a liquidity provider, go to the Pools tab and pick two tokens. You’ll need to deposit an equivalent amount of both. In this example, we’ll deposit 1,750 MOJO: as soon as you enter the amount in the MOJO field, the corresponding amount in APT will appear in the other field. If you don’t have enough of one of the tokens, you can either deposit less of both or buy some more of the token that you lack.
1. In this example, we will deposit all of the MOJO held by the account (1,750 MOJO), and the corresponding amount turns out to be 4.25 APT.

2. Click on Add Liquidity and Confirm, then confirm the transaction in the wallet. If you are seeing a ‘Not enough reserves’ error, check that you have enough of the second asset. Alternatively, try to remove a couple of decimals: for example, trying with 1750.27 can yield an error, but 1750 will go through.
3. The LP tokens will appear in the wallet. If you don’t see them straight away, close the wallet window and reopen it. LP tokens are displayed as USDT-APT, MOJO-APT, tAPT-APT, and so forth.
4. You’ll begin to accrue trading fee rewards automatically. The reward will depend on the trading volume, the amount of liquidity in the pool, and your share as a percentage of total liquidity. To claim, go to Redeem LP.
How to create a liquidity pool on Liquidswap
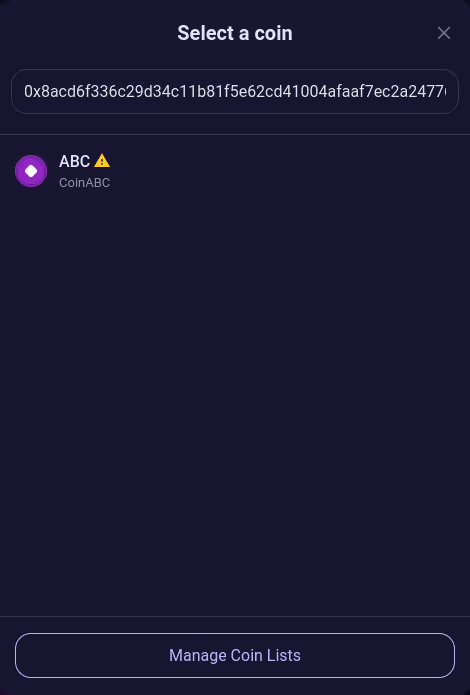
You can create a new pool for any two tokens issued on Aptos if that pool doesn’t exist already. You can either pick two assets from the default list, or use one default asset and one custom token, or even two custom tokens.
To create a pool with a custom token, insert its smart contract address in the Name or Address field. The dApp will locate it and mark it with an ‘Unverified’ icon.
The next step is to choose if your pool should be uncorrelated or stable. If the two assets’ prices are not directly correlated (such as two stablecoins or APT and liquid staking APT, for example), choose Uncorrelated.
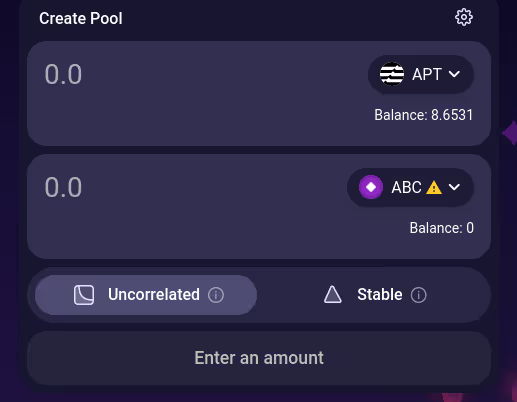
You’ll need to add liquidity to both sides of the pool - in this example, APT and Coin ABC. This is a crucial step, as the amounts you deposit will determine the behavior of the liquidity curve and the assets’ relative prices.
After depositing the liquidity and confirming the transaction in the wallet, you’ll receive LP tokens. If anybody trades the pair you’ve created, you’ll earn some passive income from trading fees.
How do I see the pool I created
To see a pool on Liquidswap, to go to Pools and pick the two assets comprising the pool. If one or both of the tokens in your pool are unverified ( are not on Liquidswap’s default list), you’ll need to enter their smart contract addresses in the Name or Address field.
You’ll be able to see the reserves of the pool you created or add more liquidity to it. Any custom coins you’ve added will also be added to your personal list (stored locally on your device), so you’ll see them on the main list on Liquidswap. Note, however, that if you want to invite others to deposit liquidity or trade using a pool that contains a custom (unverified) token, you’ll need to share the token’s address with them.
Aptos and the ecosystem
Is there a list of projects on the Aptos mainnet?
Most of the dApps being developed on Aptos are still in the testnet or devnet stage. The most comprehensive resources about the Aptos ecosystem are:
Pontem’s Ecosystem page https://pontem.network/aptos-ecosystem - soon we’ll start marking the dApps that are live on mainnet with a special icon.
MoveMarketCap https://movemarketcap.com/ - has a separate Mainnet list
We do recommend that you get familiar with the testnet. This way you’ll be able to try out the most promising dApps before they hit the mainnet. Simply switch from Mainnet to Testnet in Pontem Wallet’s dropdown menu to use them.
What is the Aptos transaction fee?

Keep in mind that Aptos gas fees can fluctuate depending on network load and other factors. These values are for reference only.
How long should an Aptos transaction take?
Transactions on Aptos are processed almost instantly, as it’s one of the few blockchains with sub-second finality. An exception is bridging transactions: it can take up to an hour (or more) to process a transfer from a chain like Ethereum to Aptos, and up to 72 hours to bridge funds from Aptos to an EVM chain. The 72-hour window was introduced by LayerZero for security reasons, so please be patient.
How to see the Aptos APT price chart
Check out the APT/USDC price chart on DEX Screener. Alternatively, you can view the APT price chart on CoinMarketCap.
Bridge
When you bridge, can you see how much gas is needed?
Yes, you can see the gas fee estimate before bridging. Select any chain and currency for which you have a non-zero balance and look for an APT value next to Gas on Destination at the bottom.

Click on it, then check the value for Medium (in the bottom right - here it’s 0.21 AVAX). That’s a good estimate of how much you’ll need to pay for bridging.
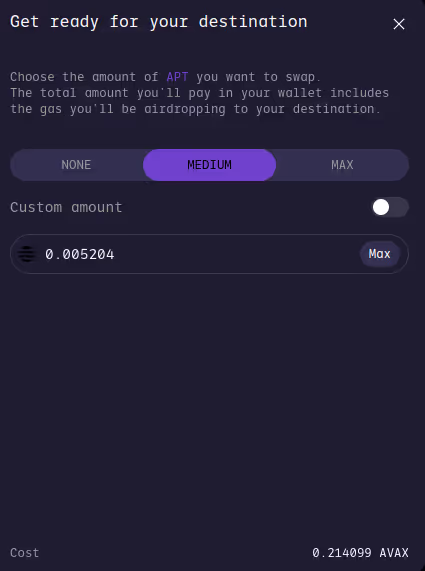
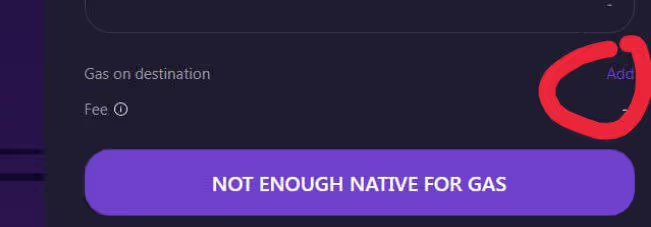
If you don’t have enough native gas coins on the source chain to cover the Medium fee, you’ll see a ‘Not enough native for gas’ message.
How long does it take to bridge from Aptos to Optimism (OP), Arbitrum, Ethereum and other chains?
It can take up to 72 hours to bridge from Aptos to an EVM chain with the LayerZero bridge on Liquidswap. The transfer window was introduced by LayerZero as a security measure, since Aptos is a new chain. In the future, this limitation might be lifted.
When you bridge from Aptos to Ethereum, Optimism, Arbitrum, BNB Chain, Polygon, or Avalanche, the bridge will display a processing time of around 4,320 minutes (72 hours). Make sure to copy the transaction ID, so that you can check its status on LayerZero Scan.
After a while, the transaction status might switch to ‘Failed’, but don’t worry and stay patient: your funds will arrive. See the bridging tutorial for details.
Why do I pay an output fee when I swap with Liquidswap bridge?
When you bridge to or from Aptos, you need to pay a fee both on the source chain and on the destination chain, as the transaction is registered on both.
If you bridge an asset to Aptos for the first time, it will also need to be registered (claimed). That’s because on Aptos, a user can only receive and transact with assets that are already registered on the account to prevent scams. Registration requires gas, so if you don’t have any APT yet, you’ll need to airdrop some APT gas together with the bridging transaction. That’s where the ‘output fee’ or claiming fee comes from.
Didn’t find your question on the list? Then ask it directly in Pontem’s general Telegram chat, Tech Support chat, or in Discord. We will also update this guide frequently, so check back often.